TiefWise User Guide
Everything you need to get started with TiefWise — from your first request to advanced workflows.
1 Getting Started
Download TiefWise for Windows or macOS. The installer is under 8 MB and requires no account or signup.
Once installed, launch TiefWise. You'll see the main workspace with the sidebar on the left and the request editor on the right.
2 Collections & Folders
Organize your API requests into collections and nested folders. Each collection can hold multiple folders and requests, making it easy to group by project, service, or workflow.
To create a collection: Click the + button in the sidebar, or right-click in the collections panel.
To add a folder: Right-click on a collection and select "New Folder".
To add a request: Click "New Request" or use the keyboard shortcut. Drag requests between folders to reorganize.
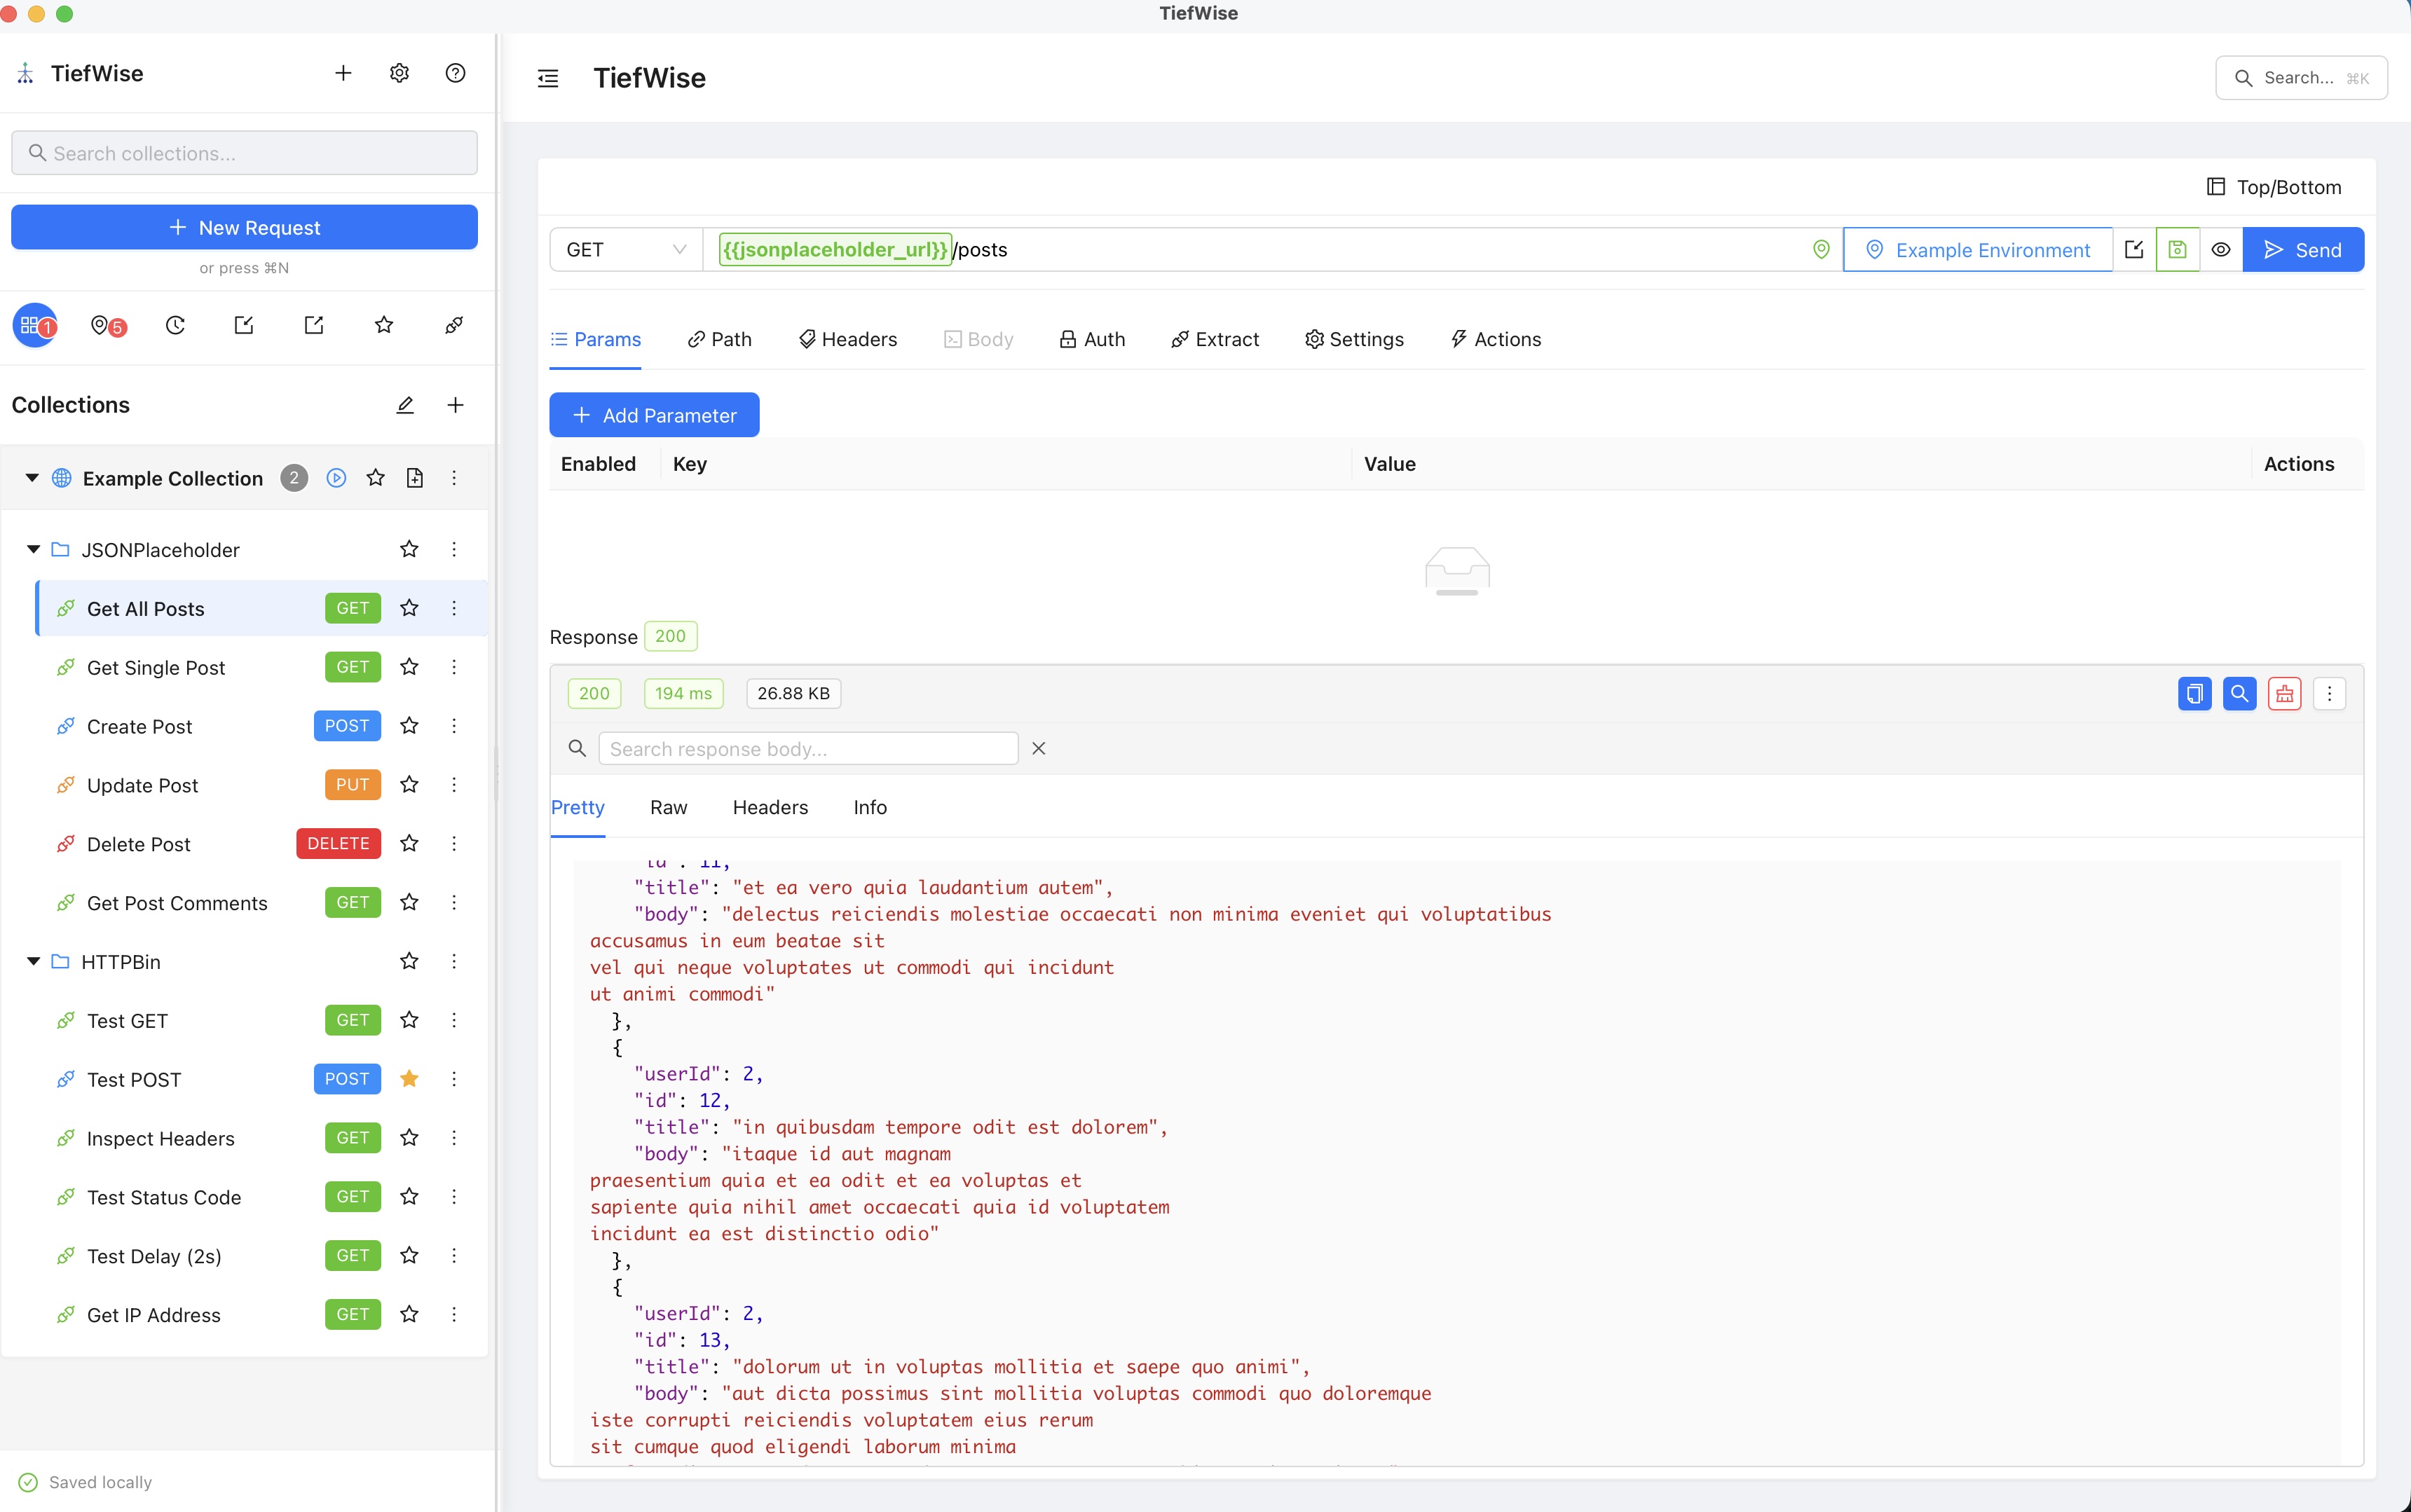
3 Making Requests
The request editor gives you full control over every part of your API call. Use the tabs to configure params, path variables, headers, body, auth, and more.
URL bar: Enter your endpoint URL. Environment variables are highlighted in the URL (e.g., {{base_url}}/posts).
Params tab: Add query parameters with the visual editor. Click "+ Add Parameter" to add key-value pairs.
Headers tab: Set custom headers. Common headers like Content-Type are auto-suggested.
Body tab: Compose request bodies in JSON, form-data, or raw format with syntax highlighting.
4 Authentication
TiefWise supports multiple auth methods out of the box. Configure auth at the request or collection level — collection-level auth is inherited by all requests inside it.

Supported auth types
Bearer Token
Adds Authorization: Bearer <token> header automatically.
Basic Auth
Enter username and password. Base64-encoded automatically.
OAuth 2.0
Configure OAuth flows with token URL, client ID, and scopes.
No Auth
For public endpoints that don't require authentication.
{{env_variable}}) to keep secrets out of your collections.
5 Environment Variables
Environments let you define variables like base URLs, tokens, and credentials that change between dev, staging, and production. Switch environments with one click — all your requests update automatically.
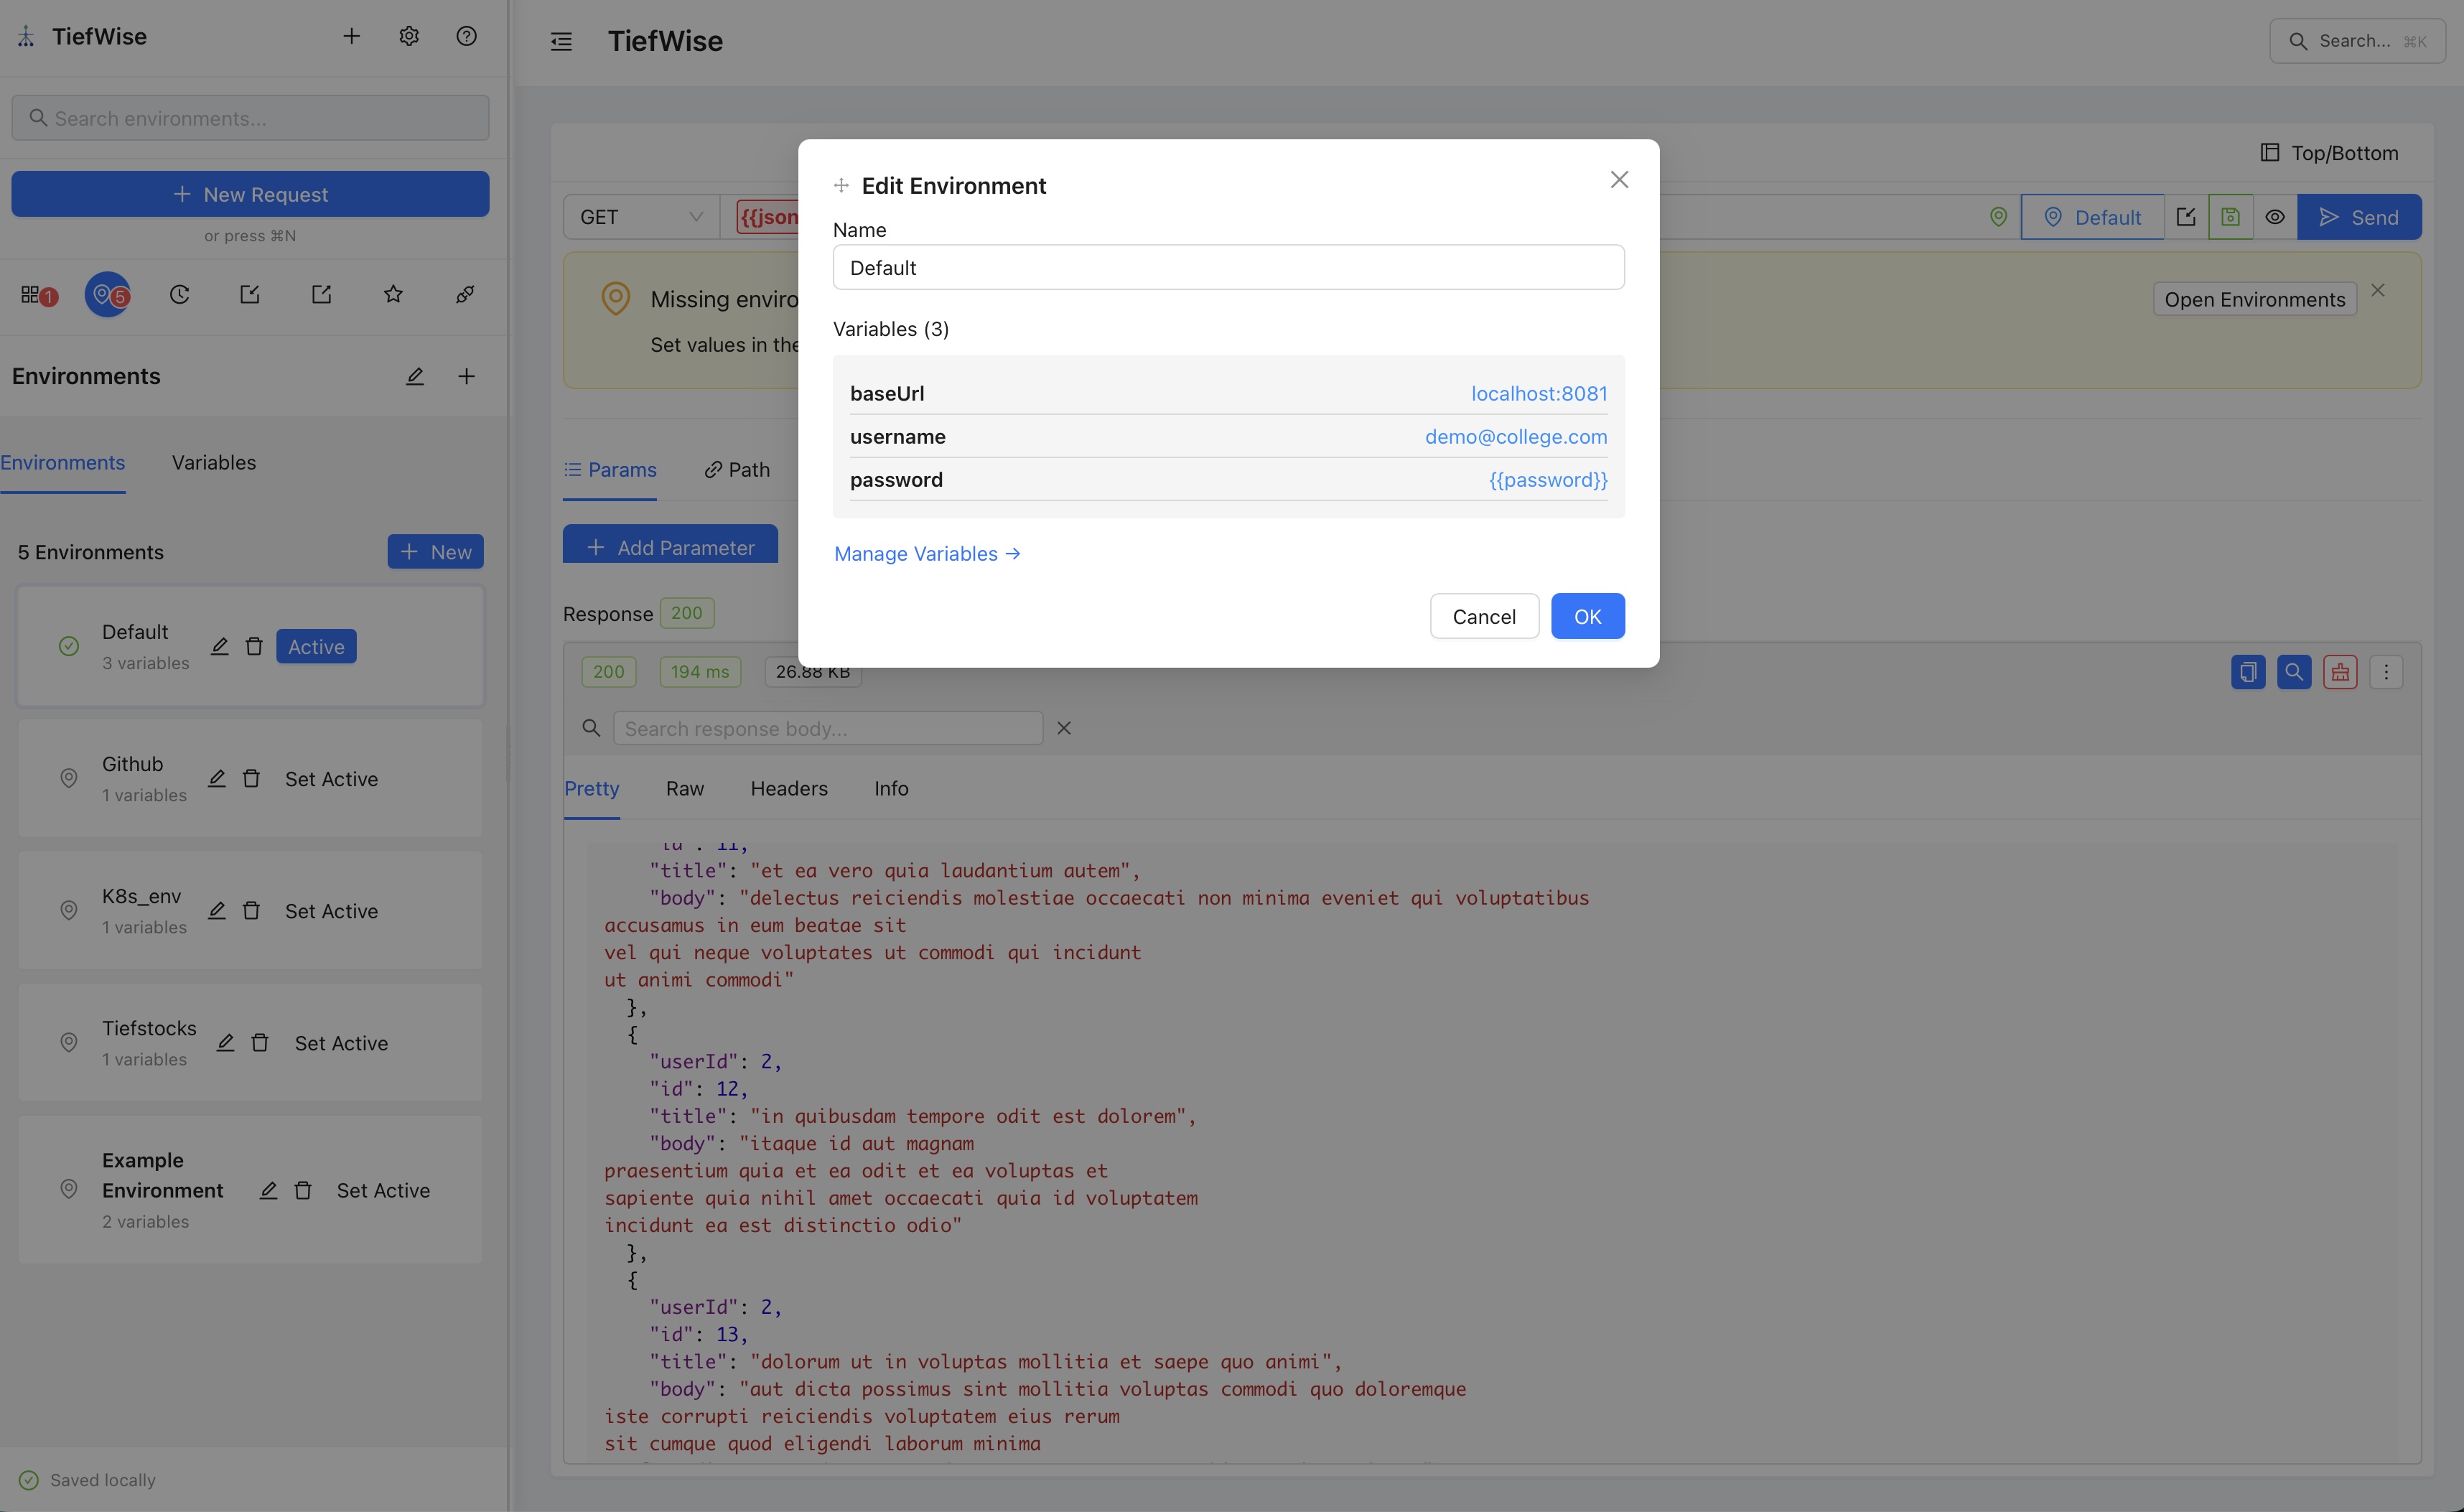
To create an environment: Open the Environments panel from the sidebar, then click "+ New".
To add variables: Click "Edit" on an environment to add key-value pairs (e.g., baseUrl = localhost:8081).
To switch environments: Click "Set Active" on any environment, or use the environment dropdown in the top-right corner.
To use variables: Reference them in URLs, headers, or body with double curly braces: {{baseUrl}}/api/users
6 Request History
Every request you send is automatically logged in the History panel. View past requests, replay them, or mark favorites for quick access.
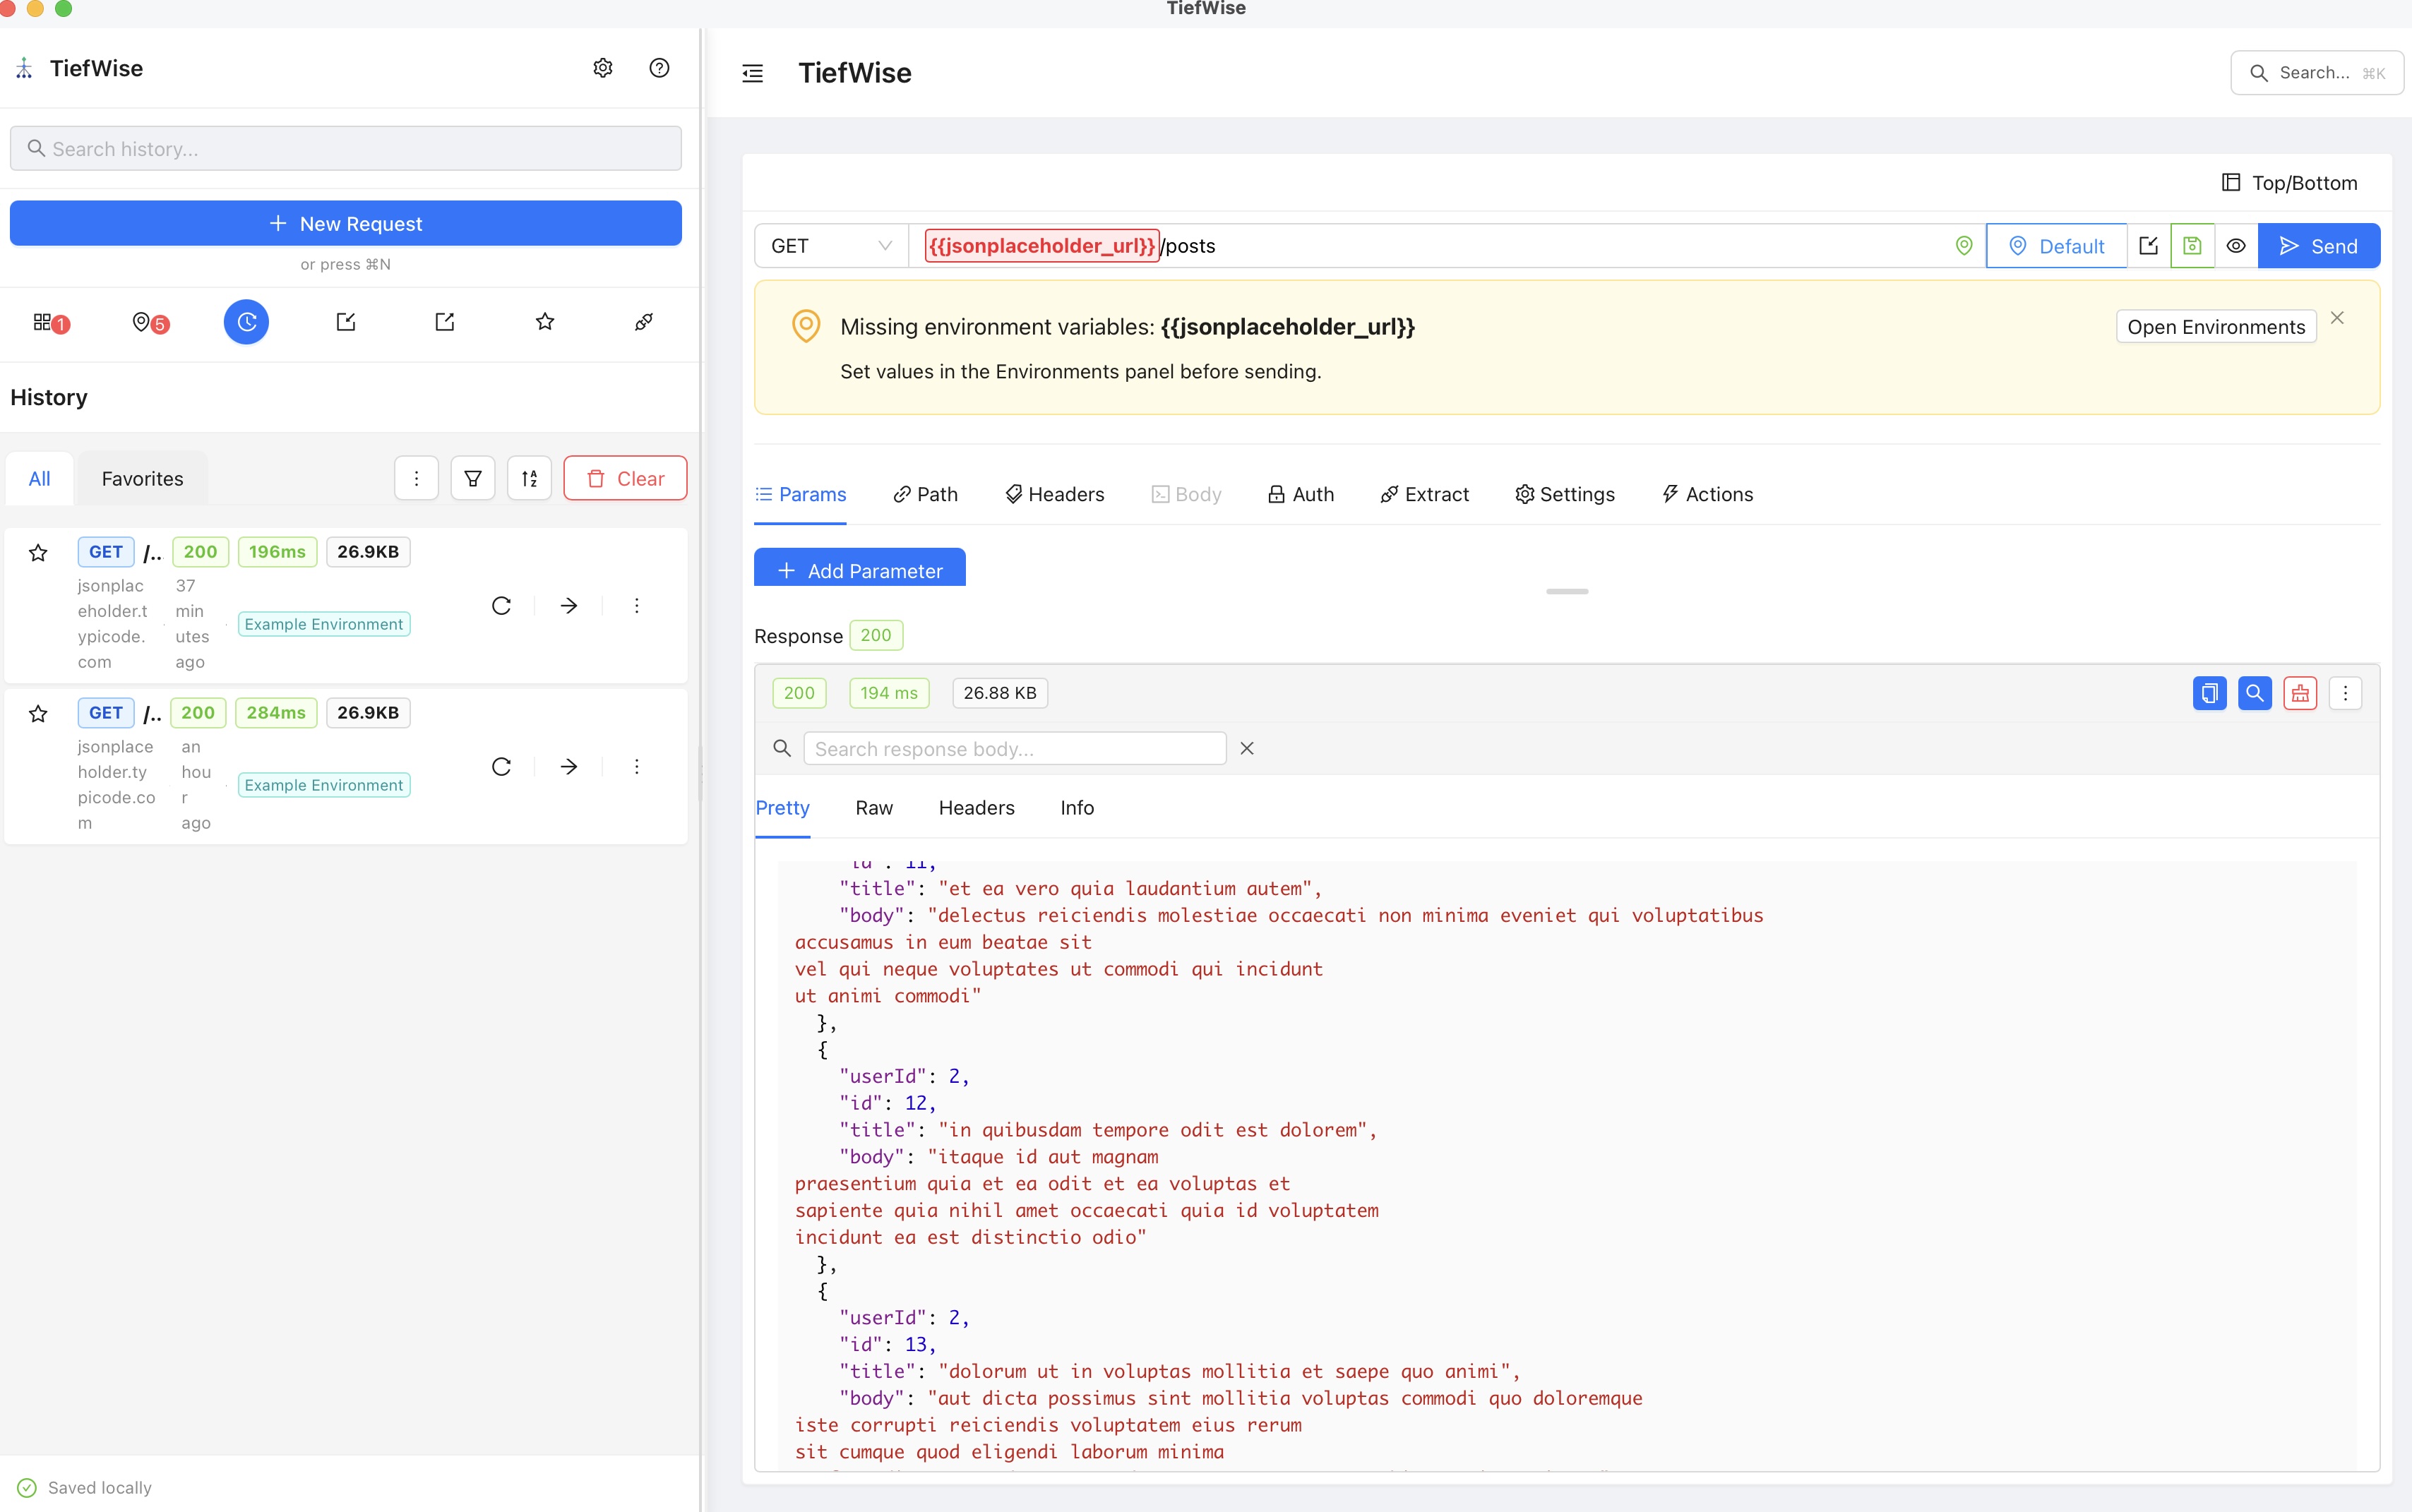
View history: Click the clock icon in the sidebar to open the History panel.
Favorite a request: Click the star icon on any history entry to pin it to Favorites.
Replay a request: Click the replay arrow to re-send a past request with the same parameters.
Filter & sort: Use the filter and sort controls to find specific requests by method, status, or time.
7 OpenAPI Import
Import any OpenAPI or Swagger specification and TiefWise will auto-generate requests for every endpoint. Supports JSON and YAML formats.
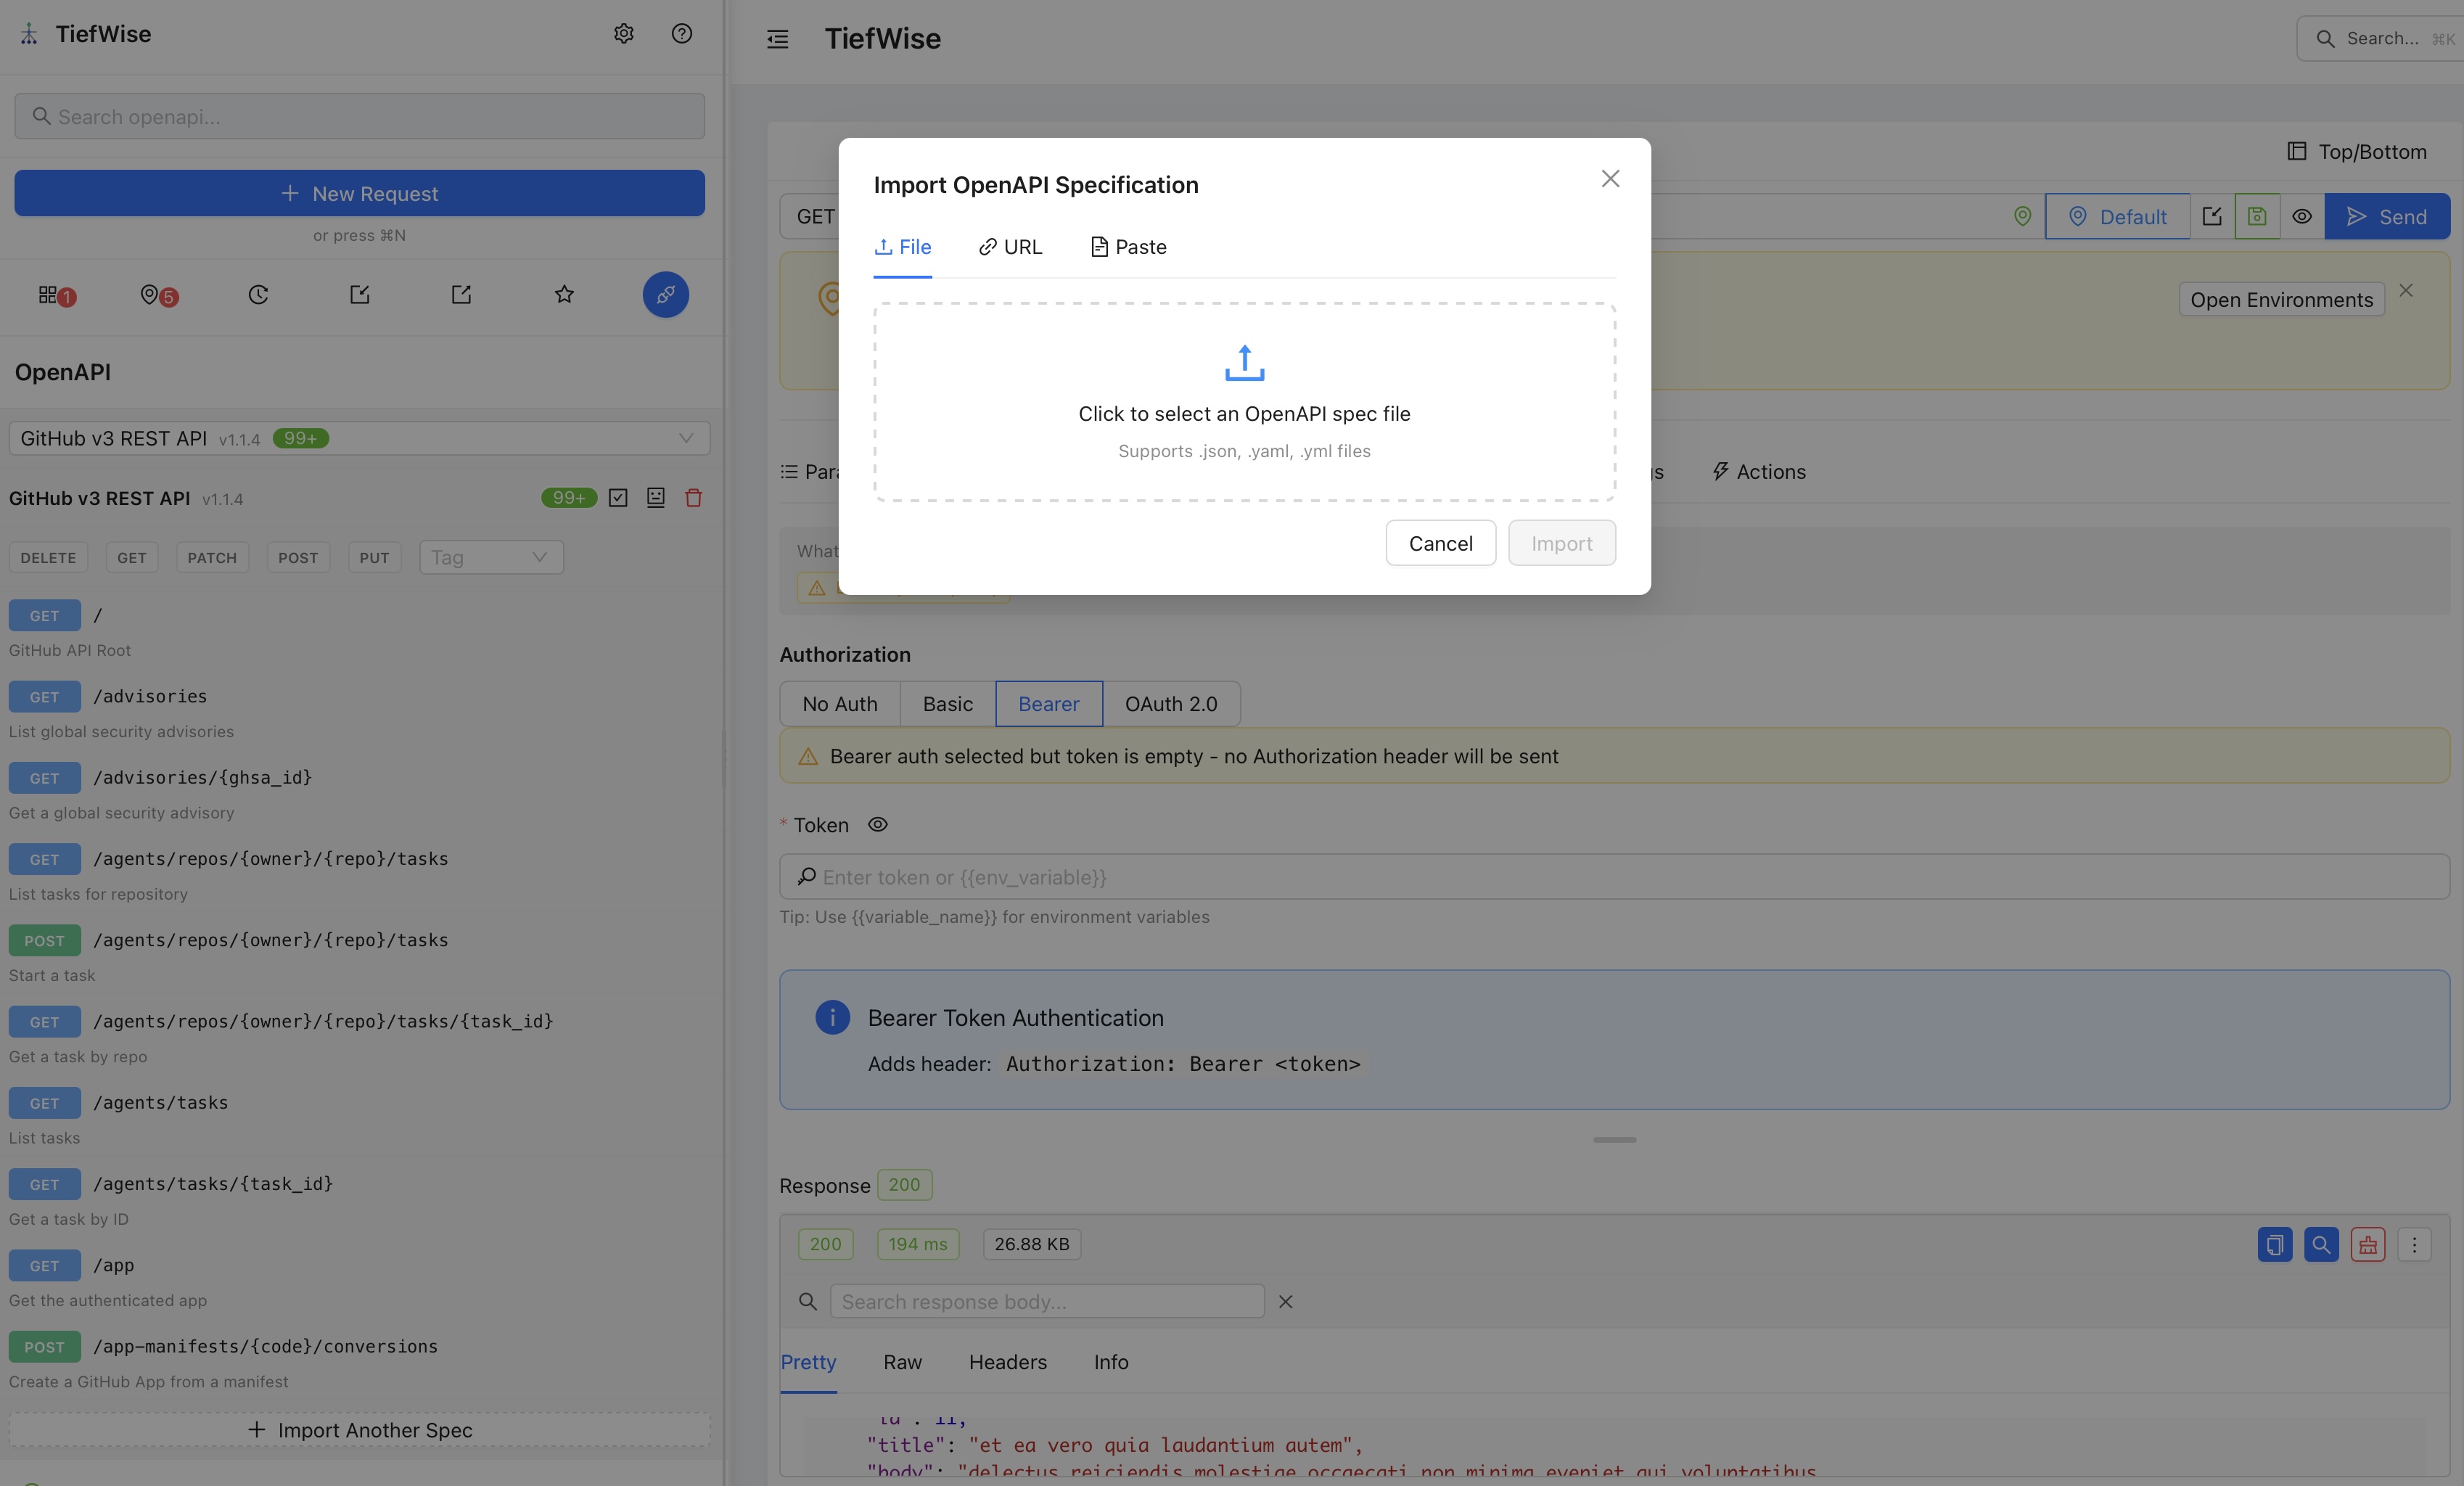
Import from file: Click the OpenAPI icon in the sidebar, then drag-and-drop or browse for a .json, .yaml, or .yml file.
Import from URL: Switch to the "URL" tab and paste the URL of your OpenAPI spec.
Paste spec: Switch to the "Paste" tab and paste your spec content directly.
After import: All endpoints appear in the sidebar organized by tags, ready to test immediately.
8 Import & Export Collections
TiefWise makes it easy to share your work, migrate from other tools, and back up your collections. Import from popular formats and export your collections for team sharing or version control.
↧ Importing Collections
Bring your existing API collections into TiefWise from other tools or shared files.
Postman Collections
Import Postman v2.1 collection JSON files. Requests, folders, headers, body, and auth are preserved.
Insomnia
Import Insomnia JSON or YAML exports. Workspaces and request groups map to collections and folders.
cURL
Paste a cURL command and TiefWise converts it into a fully configured request with method, headers, and body.
TiefWise JSON
Re-import previously exported TiefWise collections with all settings intact.
How to import: Click the import icon in the sidebar, or go to File > Import Collection. Select your file or drag-and-drop it into the import dialog.
↥ Exporting Collections
Export your collections to share with teammates, back up your work, or migrate to other tools.
TiefWise JSON
Full-fidelity export including all requests, folders, auth, variables, and settings.
Postman-compatible
Export as Postman v2.1 format for sharing with teams using Postman.
How to export: Right-click on a collection in the sidebar and select "Export", or use the export icon next to the collection name.
Export a single request: Right-click on any request and choose "Copy as cURL" to get a ready-to-paste terminal command.
Safe by default: Credentials, tokens, and sensitive environment variables are automatically stripped from exports — so you can share collections without worrying about leaking secrets.
$ Copy as cURL
Instantly convert any request to a cURL command. Right-click on a request and select "Copy as cURL" — perfect for sharing in Slack, docs, or CI scripts.
curl -X GET "https://api.example.com/users" \
  -H "Authorization: Bearer {{token}}" \
  -H "Content-Type: application/json"
💾 Backup & Version Control
Since TiefWise is local-first, your collections are files on disk. Export them as JSON and commit to Git for version-controlled API collections your whole team can use.
Security: Credentials are never exported
TiefWise automatically strips sensitive data — passwords, tokens, API keys, and auth credentials — from all exports. This ensures safe sharing without accidental credential leaks.
After importing a collection on a new machine, re-configure your auth tokens and sensitive environment variables locally.